We spent a week shooting in locations around Italy for Bentley, with photographer Graham Thorp and agency Keko London, updating classic Italian landscape photography to fit with the modern luxury of the new Bentley Continental GTI.
As we started work to create the perfect image above, it was clear that there would be some challenges along the road…photographer Graham Thorp waits for the briefest moment of sunshine. “Let’s shoot in the mountains, they said. The light and views are amazing, they said…”
Creative Director Iain Ross searches for a break in the clouds:
…but after extensive scouting (and a wait for the weather!) we’re up early and waiting for the light:
Awkward positions make for the perfect angle on those twisting mountain roads…
As workspaces go, you can’t complain:
That perfect low light for shooting needs some work for the post-production environment…
Talk to the monitor!
Beautiful sunset light on a perfectly curving stretch of road…
Setting up in the early morning – classic Tuscany landscapes:
Burning the midnight oil by the pool:
Some of the final results in print, in Harper’s Bazaar:
Sling your surfboard into the pickup and join us on location for our ten day shoot travelling across Oregon’s beaches, forests, deserts and mountains. We worked with John Roe and GTB on the launch campaign of the Ford Ranger, marking its return to the US market after seven years.
We had a Ford Ranger brought in from Australia with the same dimensions and wheel base as the new Ford Ranger, which we would later create in CGI for the final images. This helped greatly for lining up shots, and for the talent to interact with – especially for loading and unloading surfboards, bikes and so on. We had every kind of weather imaginable – sun, snow, rain and wind but thanks to the Lizard’s super fast capture, we were able to work quickly, even in the shortest windows of sunshine.
See how this shot was created in our “Making of” video here:
Next was a beach location. The photographer would first shoot the image with the stand-in truck. Then we would move the truck out of view and shoot clean backplates. In this way we could easily add the new CGI truck, and composite the talent back into the final image.
On set in a contrasting location – a very cold morning as we shoot the truck in the snow. With the truck driven away, Richard sets up the Lizard to capture a spectacular mountain backdrop.
Cold morning
Final Image:
While we were on the shoot, we talked about how it would be fun to put Bigfoot into one of the images, and we put him into a shot as a surprise for the client in the presentation. They loved it! So a couple of “Easter Eggs” made it into the final images and can be seen on the Ford site ..see if you can spot Bigfoot and Nessie! North American Product Communications Manager at Ford, Mike Levine, referenced them for people to find on his Twitter account here:
This was a fun shoot with a great bunch of people. We couldn’t resist setting up the Lizard for a 360 degree group shot. Introducing the Dream Team!
From left to right:
Jason Pachura – Location Manager
Brian Hug – Motorhome
Josh Nagy – Digital Technician
Richard Levene – CGI Supervisor
Phil Treece – DST (Car specialist)
John Kwiecien – Producer
John Roe – Photographer
Dianna Berggren – Production Coordinator
Nathan Garcia – Camera Assistant
Pete Thomas – Camera Assistant
Todd Ruthven – Creative Director
David Nonthaweth – Digital Art Director
Client: Ford
Agency: GTB
Creative Director: Todd Ruthven
Digital Art Director: David Nonthaweth
Art Producer: Gerry Kozikowski, Kim Harris
Photographer: John Roe
CGI & Retouching: Recom Farmhouse NY & London Team
Production: Roe Photo
The ultra-distinctive stylings of Bertone cars are epitomised by the angular Ferrari Rainbow. This astonishing wedge-shaped concept car from 1976 never went into production and the prototype remains concealed in Bertone’s private collection.
Through CGI we set out to bring it into a uniquely imagined world. Clemens began by sketching a deceptively simple series of shapes, exploring balance, colour and volume.
In the Recom Farmhouse London studio, we took Clemens’ initial sketches and began to work with them in CGI, turning the blocked volumes into architectural elements and experimenting with the placement of the car.
Gathering references for the concrete and asphalt. We spent time observing how the materials age, plants, water, sand and other natural forces work on the angular forms of buildings.
.Collaboratively, we created the monuments, making the abstract shapes work intriguingly but believably together. And we incorporated some pre-shot elements from Clemens – for instance, skies and figures.
Working closely at every stage with the photographer, we created the perfect setting and mood for this mysterious supercar. See how the yellow image was built up in this video:
The Mercedes E-Class with Nadav Kander for Antoni – a fascinating project creating an extraordinary car campaign. Strong lines, clear colours and striking textures combine with abstract architecture, surreal volcanic landscapes and of course the sleek refined lines of the flagship convertible.
The concepts contained angular modern architectural elements, contrasting beautifully with rough organic texture of the volcanic rock. Initially the idea was to have a modular set built that could be moved around the platform. However, this had a number of logistical and timing difficulties and so our Berlin team offered to create the elements in CGI instead. We were able to work directly with the art director in the studio to experiment with the utmost flexibility. In this way, we could perfect the shape and angles to match the layouts perfectly before the shoot began, whilst adhering to Nadav Kander’s input of keeping everything as simple as possible.
Testing the layouts and trialling different options:
With the angles confirmed, the shoot began.
Fresh from his fascinating portrait of Donald Trump for Time Magazine’s Person of the Year cover, the Nadav Kander flew to Lanzarote to shoot backplates and HDR spheres.
Scouting for the perfect locations for HDR spheres in the volcanic island landscapes:
After Lanzarote, we took more backplates at this spectacular location on the Spanish coast. This was the view from the infinity pool – if you squint, you can just see Africa.
The crew assemble…
Only the topmost graduates of The Handsome Boy Modelling School can throw a towel off and jump in the pool with such verve and élan…
Perfect dive!
Our own modelling efforts are less professional.
Still, everyone looks better with a giant yellow head. You can just see the base of the cherrypicker beside the pool, to take the shot from a direct birds-eye view.
High up above in the cherrypicker
Up in the sky for the perfect angle
The Recom poolside cabana is fully equipped! Processing and checking everything will fit together perfectly.
As the car was top secret at the time, it couldn’t be photographed on location, and was shot at a secret platform on a closed set with high security. We lived for a few days in a gilded cage, not leaving the hotel with its three shooting platforms.
This was our work view for the week! We have to confess we much preferred the pool….
Once the car and backplates were safely captured, we began work on putting together the images. We set the car seamlessly in the volcanic landscapes, and refined the textures and shapes of the CGI architecture.
Client: Mercedes
Agency: Antoni
Photographer: Nadav Kander
Creative Director: Tillmann Gossner
Art Director: Patricia Scheder
Art Buyer: Valerie Opitz
Production: Seaquist
Representation: Olivia Gideon Thompson at We Folk
CGI Artists: Sebastian Schierwater / Recom Berlin
Post Artists: Jonathan Clarke, Jonas Disch, Stephanie O’Connor, Jonas Braukmann / Recom Berlin
The i3S is the sportier brother of BMW’s electric compact car. For the launch, BMW wanted a strong real-life feeling – as if passers by had taken some snapshots. Shot over eight days in the streets of San Francisco, Andreas Hempel used natural light in urban situations, using a current model as a stand-in.
With the plan being to use as much natural light as possible, the preparation day started out rather worryingly…
However the next morning was much improved and the team assembles for the first shot:
Timelapse of setting up a shot:
Lunch break, San Francisco style
As each first day’s shooting is complete, with on-set support from our Stuttgart team, we prepare to work our magic!
Work begins…
Reference photos for wheel reflections.
More high-speed work
Getting on the the low down for the perfect angle…
A complex setup to capture a spontaneous moment…
Setting up the shot, preparing for the moment when the light is at the perfect angle
And – there it is! We swapped in almost the entire front plus a few other distinctive parts of the new model in CGI, and intensified the dark, shadowy look. See the full series on our site here
Client: BMW
Agency: Serviceplan
Photographer: Andreas Hempel
Creative Directors: Jan Grothklags, Falk Pegelow, Mark Räke
Art Director: Christine Behrendt
CGI Artist: Andreas A. Maurer / Recom Farmhouse
Post Artists: Jonas Disch, Laura Kißner / Recom Farmhouse
Inspired by the 80s horror movies we love, and particularly by The Evil Dead, we decided it was time for us to star in our own Night of Terror. Of course we’ll need the right vintage of car, complete with wood-effect side panels.
Image one: The Axeman Join us as we willingly enter our own world of fear in the Making-of video!
[vimeo 237740867 w=640 h=360]
Now we’ll drive together from our small-town American home to a cabin in the woods…what could possibly go wrong?
Image 2: The Cabin
We built our movie-inspired sets in CGI using Maya. We were striving for a cinematic feel to the scene, so the environment is all-important – it becomes a character in the story that we’re telling.
With the layout of the shot decided, we added textures, and began work on the lighting.
For lighting direction we found a lot of inspiration from the photographer Gregory Crewdson. The exquisite lighting of his elaborately staged photographs, many of them taken at night, create a mood that connects the viewer to the story he is trying to tell.
We lit and rendered the scene in Vray and rendered volumetric fog for the desired atmospheric effect.
With final adjustments in Photoshop, the scene is set.
What will happen to us here? Will we stay together, sensibly turning our finely tuned monitors into security cameras, and using our Wacom styluses to defend ourselves? Or will we inevitably become separated in the forest? …Stay tuned….
“Grow Up” is the most extensive content creation in Mercedes-Benz’s history. Produced by Antoni, it’s a groundbreaking campaign centred around five short films. With young stars like rapper A$AP Rocky, the films tell a story that completely revolutionises the image of Mercedes-Benz, with the car becoming a natural ally for millennials in their journey to adulthood.
“Our competition isn’t ads, they’re real films, real TV shows. Stealing four minutes from the time people would be watching their favourite show on Netflix is a tall order, so we tried to be honest with ourselves with what people might actually be interested in.” – Veit Moller, Creative Director (LBB editorial interview)
For the accompanying stills, we worked closely with CD Veit Moeller and young photographer Alice Moitié – printing and re-scanning, adding grain to create a strongly analogue film look, with CGI elements helping with the practical aspects of a worldwide campaign.
The campaign’s media locations are as bold and eyecatching as the rest of the execution, with colossal end-of-wall murals featuring single shots montages from the campaign, and big bold statement cubes in high traffic areas.
The shots were also a big success across digital media, showcased on the innovative website and shared widely on social networks.
The campaign has drawn wide praise for its radical approach
“Mercedes-Benz’s Most Ambitious Marketing Project Yet Is All About What It Means to Grow Up Tackling the evolution of luxury … and, well, life” – Adweek (Ad of the Day)
“It’s hard to make a good car ad these days. Audiences are bored of the slick fare they are usually offered, and yet most clients still really, really want that shot of the beautiful new vehicle driving around the cliff edge. In this new set of films, those scenic shots are there …nestled in among a set of stories that are intriguing, and at times a little darn bleak….These new films make a welcome addition to the car-ad-as-short-film genre and sure beat the average shiny car spot.” – Creative Review
Client: Mercedes Benz
Agency: Antoni
Creative Director: Veit Moeller
Photographer: Alice Moitié
Post Artists: Jonas Braukmann, Thomas Saalfrank, Julia Ackermann, Daniel Mattes, June Lee, Stephanie O’Connor / Recom Farmhouse
Art Buyers: Emanuel Mugrauer, Valerie Opitz, Marjorie Jorrot
Production: Iconoclast Germany
Our friend Nick Meek approached our London team with this evocative night shot from Tokyo.
He took it a while ago and always loved it, but kept feeling it needed something extra. He began to wonder what it would look like if the rolling gate was opened – just enough to reveal something special.
Researching vintage cars, he found an unusual and elegant 1970s supercar with a plum paint and golden trim to the scene, and asked us if we could add it to the scene.
Excited about this extraordinary request we reached into our magic bag of CGI tricks, lifted the door and settled on parking this sweet Maserati Bora inside.
After a successful collaboration process, we’re all happy with the atmospheric result.
Red Car, Red Room
We were so happy with how the Maserati turned out that we wanted to work with it some more. A CGI group challenge, themed on “Red Car, Red Room” was the perfect place to take the car out of the garage and reveal it in all its glory. Take a closer look at the exotic and gorgeous Maserati Bora in detail here.
Crop detail of the gold trim:
Software:
Autodesk Maya
Chaos Group V-Ray
Adobe Photoshop
We relished the challenge of creating this CGI Porsche Panamera in the rain for a campaign from Kemper Kommmunikation with photographer Erik Chmil.
Here’s a look into how we made it. There’s a selection of 100% crops to zoom in on the details, and a video where you can feast your eyes on the perfectly rendered raindrops on the CGI Porsche.
We used Autodesk VRED to make the car. This execution, with its intricate raindrops, was particularly interesting. The finished image (above) is packed with finely observed details.
As always, the CGI process is grounded in observations of reality. CGI artist Ivo Stanev spent time studying the interaction between the raindrops and the surface of the car. The water acts like hundreds of tiny lenses and we found the best way to light them was to use high resolution HDRI spheres.
Due to their hemisphere shape, formed as the round drops hit a flat surface, the raindrops catch light from the many sources in a night scene like this- street lamps, headlights, windows and so on. This is what makes them sparkle.
Mapping techniques:
To do this, we used high-resolution rain textures with displacement mapping. However, because we wanted to be flexible it was important to react quickly to changes, so we used both triplanar and UV mapping (the process of projecting a 2D image to a 3D model’s surface for texture mapping )
Working with triplanar mapping gives us flexibility because we can easily change the form of the raindrops, especially as the CGI modelled Porsche has High Density Geometry. A good example is the windshield, where UV mapping allowed is to model windscreen wipers with a specific movement. For the rest of the car we used triplanar mapping for flexibility.
It was important for us to show the effect of the wind, changing the shape of the raindrops as they move along the surface of the car’s body.
Also some elements are not as simple to add as you might imagine! We wanted moving, blurred windscreen wipers of course…so we carefully painted where and how the raindrops moved, depending on the motion of the windscreen wipers.
The rendering took a lot of time as well – we used full Global Illumination with a lot of samples…and of course only one HDRI sphere wasn’t enough, so we had to use two or three of them.
We are really pleased with the end result – the painstaking work paid off beautifully.
Fly though the details in our video here…
Client: Porsche Agency: Kemper Kommmunikation Photographer: Erik Chmil Creative Director: Nadine Kubis Post-Artist: Thomas Fritz / Recom Stuttgart CGI Artist: Eugen Albrandt / Recom Stuttgart CGI Artist: Ivo Stanev / Recom Stuttgart
We were delighted to work once again on the post-production throughout the shoot, both on location and in the studio.
This was a shoot of epic proportions!
3 months
3 productions
27 major exterior shots
50 detail shots
6 different models
Crew of 18
The Southern California locations included urban LA environments, desert highways, bridges, as well as an airport and a racetrack. With one of our retouchers constantly on set, we were able to jump start the post production. First pass amends could be in place before sending files to the agency, with feedback from Nick and the clients on set already incorporated.
The production convoy sets off to the desert:
[vimeo 209168296 w=640 h=360]
The car travels in the finest style of course.
Gear and preparation:
Nick’s camera mounted to the end of the rig and ready to shoot.
So many measures to work against the fierce desert sun! This flexible arm keeps the camera in shade and and can also be used to block flare.
It’s a long walk back once the rig is set up – this is at its maximum extension.
The captures go directly to Kate’s workstation. We use walkie-talkies to keep in touch, so post-production can begin smoothly and directly from the image capture.
This exterior station is a convenient direct point for the client signing off elements such as the angle of the car. Left to right: CD Doug Kohnen of CP+B, Kara Hughes of Infiniti, Nick Meek.
Nick inspects some images in the workstation.
At other locations, a smaller portable sun shelter is useful.
Nick goes handheld and low angle for detail shots.
Setting up the ‘Lizard‘ to capture HDR spheres for reference, so we have a full record of the background in case of any later alterations – this means that if we need to change any details we have an accurate record for reflections and lighting on the car.
Capturing some city skyscrapers with the Lizard for use as backup for the city location, in case they were needed.
Life on the set
Tunnel vision can set in on these long shoots…
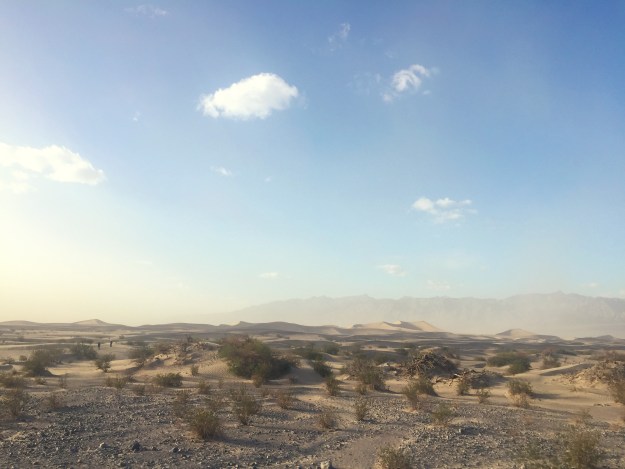
But the epic skies and open desert are stunning.
Hats are a necessity when working long hours in the blasting desert sunshine.
Clouds drift by as we wait for the perfect light
[vimeo 208800098 w=640 h=360]
Even in the desert, the production team have to be vigilant – when the weather comes in, it happens fast! Approaching storms mean everything has to go under cover at very short notice.
Here it comes!
However the show must go on – no storm can stop Nick from continuing to work! Even in these conditions, he was able to capture great results. These were the shooting conditions:
…and this is the final result!
The precipitation did have some unexpected and spectacular side effects…
In between all the hard work during these long days on the road there were always moments of fun, where we got to play with an array of toys the crew had brought along (e-skateboards, mini motorcycle, remote controlled cars etc), and as we were being baked by the hot desert sun, we got to listen to some fine tunes by the motorhome band, while being spoiled by some amazing catered foods – Many thanks to Will Taylor of Ink and Oranges for their work on production!
Recom kept standards high with Kate coming first in her Go-Kart team.
The rig came in handy as a gigantic “selfie stick” to capture the crew, though no cable release was long enough to operate the camera!
All in all a very productive and delightful job. It was great to work once again with Nick Meek, the production was a big success and the same team is currently in the US working on the next Infiniti project.


